• Click here to access some of the presentations made during the 2022 National Rally

Considering Replacing GD1620 2000w inverter with Victron MultiPlus II

Ben and Kathy

Well-known member
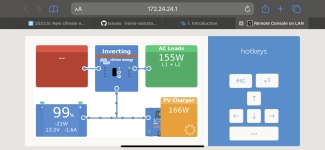
@Ben and Kathy - I too use Home Assistant both at home and in the RV. Have had it in the last 3 RVs. Love it. Exposing all the Victron date (via the Cerbo) to the network via MQTT and picking that up off the network in HA. I have a view with all the Victron stuff in it and then use various Victron entities on cards here and there.

Here's my RV's Home view:

View attachment 996
Here's my RV's Power view:

View attachment 998

Oooohhh, Love the screens; travel ready, check list, just love it all, really nice, thanks for sharing!!! Love the slider for the AC In Current Limit

If you don't mind, can I reach out to you when I'm ready to start integrating for some tips, perhaps a new thread?

I've been running HASS at home for about 3 years; this will be the first RV experience. Prior to that, over the course of 45+ years, multiple commercial packages CQC, Premise, and something I can't remember any more. Started with X10 when it first came out, got hooked as a kid!
 

Ben and Kathy

Well-known member
Well it's been a while since I've posted, more progress has been made...

Todo:
  • Still have the solar panels to install but the solar inverter is in place. (I have to run new wire from the roof, factory installed solar prep wire not found, not there
    🙁
    yes it was, see below
    🙁
    ... :mad: ... :oops: ... :D) Panels will be wired 3x in series, 2x in parallel Nope, now doing 2x in series, 3 in parallel to mitigate shade risk of one of the panels in the array (installing connected pair on same side of rig to maximize solar exposure as the sun tracks across the roof)
    • Progress Made...
    • Ran new wire from the roof to the basement (I'll post separately on that) in the roof to basement wire raceway (left a pull string for future use)
    • Found, yes, finally found, the installed solar prep wiring (but only after I ran my own wire of course)
      • Prior dealership / owners / repair dude had taken the solar prep wiring and hooked them into the 12v + and - terminals on the original batteries thusly running 12v to the roof connector. When I converted to the Victron hardware plus moved the location and installed Lithium batteries I put in bus bars on the front wall, and rewired what had been attached to the batteries to the bus bars. Went back to my correspondence with Alliance Support one more time, they said "look for purple wire wrap on the lug terminals - that should be your solar." Getting very fixated on the color purple I grabbed a flashlight and started searching very methodically... Low and behold there was a negative 10 guage wire that had a purple wrap. Went looking for it's positive sister, didn't find her but did find another 10 gauge wire with a new lug connection, without purple. DOH, double DOH and a few other choice words!!!
      • Found the same wire bundle behind the wall on the camp side front compartment in the back of the RV (the one adjoining the 1/2 bath wall in the basement) that had a suspiciously cut and connected back together pair of 10 guage wire with wire twist nuts. (I can't tell you how many times I have handled that bundle over the last few months going "what's this, looks like, feels like it's for the solar..." Put a toner on it, toned the newly discovered wires in the front of the RV, heard the magic toning warble, did a major happy dance, nearly passed out from 100+ air temp and 100% humidity exerting myself dancing (not really, but damn it was hot), then pounded an entire beer in celebration
      • Having found the original wiring, I used that to connect to my newly run roof wire through the conduit and box that I installed on the roof. In the front bay I ran new wire back to my solar inverter
    • Have just mounted the first pair of panels on the roof (another post perhaps) one pair down, two to go.
  • Done: Also need to run 30amp line from tow vehicle.
  • Done: Also have not installed the touch screen inside. Will have to pull the wall to run the USB / HDMI cable (and ethernet) for that.
  • Need to run power and add a remote switch for the heating pads
  • Need to add a remote switch to power off the inverter
  • Need to add a test button with an LED light for each battery to validate fuse is not blown (Each battery has it's own 250v T-Fuse that is located behind the wall so not easily visible or testable)
  • Done: (works as expected) Test the modified transfer switch wiring for the generator with new system (haven't had time yet)
  • Some kind of additional protection wall to keep items stored in front compartment away from power wall and wiring
  • Mod/hack the Lynx power distribution module so that LEDs show the status of the fuses.
-Ben and Kathy
 
Last edited:

Ben and Kathy

Well-known member
Using the roof to basement conduit for new solar wiring run:

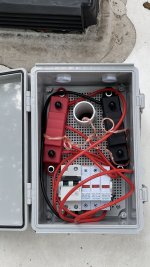
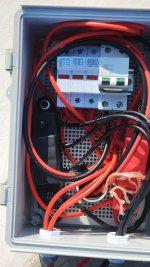
Once I figured out which cap to pull off I removed said cap and installed a waterproof junction box. Junction box required a wee bit of modification (drilled a big round hole in the bottom, to accommodate the wire conduit to the basement. I ended up adding an extension tube to the wire conduit to take it up into the junction box. The junction box was pre-assembled at home with the breakers, fuses and bus bars installed and partially wired. (what is pictured below)

That was the easy part...

You would think it would be straight forward to drop a weighted pull string down a pipe, gravity is your friend, so yes, that was the easy part. The challenge came to be that the heater vent for the 1/2 bath in our 385 was directly underneath the opening to the roof conduit. So after multiple attempts to "grab" the string with remote claws I carefully pulled the vent off the wall and grabbed the string. From there I fished it back out into the side compartment.

So, that was still fairly easy. Then came the actual wire pull. Turned out that there was enough friction between the heater duct pipe and the bottom of the roof conduit (not to mention a 90 degree bend) that it was not possible to pull the wire from the roof through the side hatch. Picture this, I'm on the roof doing the heave ho and all I am seeing is a pull string that is stretching. So back to the half bath, pull the vent again and had my beautiful bride feed the wire up through the pipe as I pulled from the roof. Moral of the story, it's a two person job and wire does not like to be pulled across a 90n degree bend!


Solar Junction box - pre.jpeg
 

Ben and Kathy

Well-known member
Solar Panel Install #1...

Over all goal, install roughly 1000 watts of solar without adding a bunch of weight to the RV...

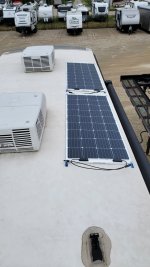
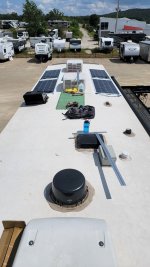
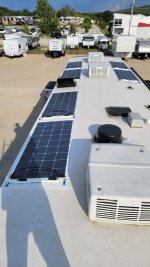
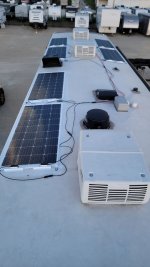
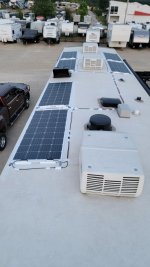
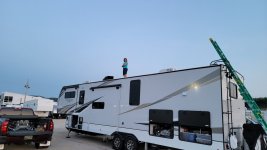
So over the course of three weekends (in a row) for a total of about 25 hours on the roof below is the install of six 175 watt Renogy flexabile solar panels.

My install is based on information from multiple YouTube videos made by RV With Tito DIY (thanks for the ideas!) though in my case I did drill holes to secure the end result.

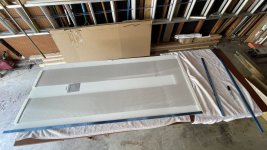
First, below is a pic of the backside of the panel. I attached a thermal layer to keep the panels from directly contacting the roof. The barrier is paneling intended for walls / roof of a green house. It is made up of 1/4" square channels.
Solar 0 - Backing Prep.jpeg

Next are a series of pictures depicting progress over the course of the install:

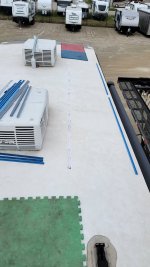
first pair of panels, channels marked and attached with double sided Eternabond tape
Solar 1 - Install 1.jpg

Solar 1 - Install 2.jpg

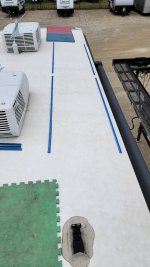
First pair of panels anchored to the roof

Solar 1 - Install 3.jpg

Second Pair...
Solar 1 - Install 5.jpg

Third Pair (predictable, huh?)

Solar 1 - Install 7.jpg
 

Ben and Kathy

Well-known member
Solar Panel Install #2...

The wiring:

Each pair was wired in series and then run back to the junction box. MC4 wiring was terminated on the roof

Solar 1 - Install 8 Wiring  .jpg

Finalized Junction box wiring
Each array has it's own fuse. Before leaving the roof, power runs through a double pole breaker to protect the wiring and to allow for the ability to turn off the flow of power from the roof if I need to work on the wiring)

Solar 1 - Install 8 Wiring  Junction Box.jpg

And the finished product, wiring completed and everything taped down with Eternabond roof tape.


Solar 1 - Install 8 Wiring Final.jpg

The leading edges (front of the RV) of the panels are taped down with 4" Eternabond to ensure that air cannot get up underneath any of the panels.
 
Top