• Click here to access some of the presentations made during the 2022 National Rally

Alliance Delta 252RL Multiplus II 2x120 Install

billymac

Member
New 252RL owner. I could use some help/guidance and have questions. Our 252RL is a 50A trailer, has inverter prep, 40A Rich Solar MPPT and 200W solar on the roof.

Use case is occasional boondocking and cold camping for ski season.

I was initially looking at Progressive Dynamics PD1620A that others have opted for as an "easy" drop-in solution, but now leaning Multiplus II 2x120 after considerable research. My current plan is to remove the camp side black panel in the passthrough for install location (have seen others use this space) and will locate batteries under the bed in the coach for easy/close wiring access. I plan to use a single 8D 460AH battery with 250A internal BMS to start, but likely upgrading to 2 soon after. So, targeting 920 total AH. For the time being, I would like to continue utilizing the stock Rich 40A solar MPPT.

The install looks fairly straight forward, but I have some rookie questions, so please bear with me.

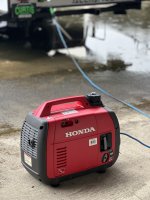
1. Under what circumstances do I NOT need to upgrade the wiring running from the "inverter prep" junction box in the passthrough back to the panel at the rear of the coach? This seems to be the most daunting task of the install. I've seen others upgrade this wiring online, but I'm not sure I'm super comfortable with trying to tackle this. Someone I know installed the MP2 in their Paradigm and used existing prep wire for the AC in/out on the MP2, with 2/0 for the batteries and has just come to terms with the fact that they need to run their Honda EU2200i generator if they want to run an AC unit, microwave or fireplace. Their logic is that if you're boondocking in hot or cold, it's likely others have their generators running too and unless you're willing to spend a ton of money on batteries and give up space, you're not going to get much runtime anyway. I think I could be okay with this logic and purchased a Honda EU2200i already. Open to arguments here. I guess what I'm saying is, it would nice not to have to bother rewiring this part. Can someone advise, please?

2. Do I need an ATS with the MP2? I could be wrong, but since my trailer has inverter "prep" only, I don't believe I have one stock. Doesn't the MP2 more or less act like one since it's wired in between the pedestal and the panel? What do I have to do when I connect/disconnect from pedestal or generator?

3. If the answer to question #1 above is I don't need to upgrade the wiring back to the panel and am fine with not powering both legs of the coach, what exactly do I need to do back at the panel for "disconnecting" the charge controller? Simply switch off the breaker? What else do I need to change with the wiring in this location?

I'm sure I'll have more questions, but hoping someone can help get me on the right track with the questions above as I start to finalize my plans and before I start buying kit.

Thank you in advance for any advice, guidance and insight!
 

Jim Beletti

Well-known member
Hi @billymac - you got a lot going on in your post. While I'm not employed by Alliance RV, I do have some experience in this area and would be happy to chat with you by phone to give you some suggestions. PM me your phone and what time zone you're in. I'm in the Central time zone and am open for a chat most any time.
 

billymac

Member
Hi @billymac - you got a lot going on in your post. While I'm not employed by Alliance RV, I do have some experience in this area and would be happy to chat with you by phone to give you some suggestions. PM me your phone and what time zone you're in. I'm in the Central time zone and am open for a chat most any time.
Thanks Jim! DM sent. I'm PDT, so call any time. I drove to storage this afternoon to install some upgrades and spent some time looking at the existing wiring. I'm starting to wrap my head around it, but want to make sure my plan is solid and still have questions.
 

billymac

Member
@Jim Beletti - thank you so much for spending time with me on the phone, Jim! Incredibly valuable information and I'm now getting a clear picture of my options to move forward. In the near term, I'll work on finalizing a design, parts list, layout and circle back with a design for validation/feedback. Thank you again, so much!
 

billymac

Member
@Jim Beletti or other Admin - can you please rename subject of this thread to:

"Alliance Delta 252RL Multiplus II 2x120 Install" ?

I would greatly appreciate, thank you!

Quick update:
I haven't had much time lately due to work and family vacation, but I have begun buying some of the necessary parts and pieces. I've also started a list of necessary tools and small accessories I'll need to complete the work.

So far, I've picked up the Cerbo GX, Solar 100/30 MPPT, Lynx Power In (will modify for fuses), Smart Shunt 500A IP65 and the MK3-USB interface adapter.

I've got a few friends who are looking into pricing for me on the necessary 6/4 SOOW AC wire and 4/0 battery cable. One is an electrician, who's happy to procure if he can. Are those wire sizes appropriate? My batteries will be located very close to the Multiplus under the bed in the coach. The two runs back to the inlet/panel will be roughly 25-30ft each.

That leaves the inverter itself, the batteries, the Cerbo display and some odds and ends. I'm leaning towards buying (2) Li Time 460AH 8D batteries. They have 250A BMS and decent specs. I'm going to stick with the stock 200W Rich solar panel on the roof until next spring, but don't plan on probably adding anything more than another 200W panel in parallel for the foreseeable future. I have a generator as well.

I could use some help on the fuses and sizing--especially on the Lynx. I'll keep reading and see what I can learn.
 

Jim Beletti

Well-known member
I've got a few friends who are looking into pricing for me on the necessary 6/4 SOOW AC wire and 4/0 battery cable. One is an electrician, who's happy to procure if he can. Are those wire sizes appropriate? My batteries will be located very close to the Multiplus under the bed in the coach. The two runs back to the inlet/panel will be roughly 25-30ft each.

I could use some help on the fuses and sizing--especially on the Lynx. I'll keep reading and see what I can learn.

See my feedback below. Note that I am NOT an expert or professional in this area. I have created 3 systems for myself thus far and that's the extent of my experience.

Inverter AC In and Out wiring
- 6/4 SOOW cordage for the AC runs is what I generally use. (examples)

Battery to DC Bus and Inverter wiring
- I generally use 4/0 battery cable on 12v inverter systems. Are you going 12 or 24 volt on your inverter and batteries?
I've used Temco and Windy Nation (examples)

Fusing (assuming 12v system)
I generally bus the batteries, then fuse them, then add a 600A switch (this one - sorry, the good stuff is not cheap). For this...
- I generally use a 400A ANL fuse (and holder) between the bused batteries and the switch (class T fuse is also popular)
- I generally use a 400A Mega fuse between the DC bus (Lynx) and the inverter input (assuming 12v, 4/0 or dual 2/0 cables)
- As for other DC ins/outs on your Lynx, fusing values will be a function of your wire guage which should always be a function of your expected max current draw plus some head room

The Victron Wiring Unlimited Book is a great resource, no matter what brand of equipment is to be used: https://www.victronenergy.com/media/pg/The_Wiring_Unlimited_book/en/index-en.html
 
Last edited:

billymac

Member
See my feedback below. Note that I am NOT an expert or professional in this area. I have created 3 systems for myself thus far and that's the extent of my experience.

Inverter AC In and Out wiring
- 6/4 SOOW cordage for the AC runs is what I generally use. (examples)

Battery to DC Bus and Inverter wiring
- I generally use 4/0 battery cable on 12v inverter systems. Are you going 12 or 24 volt on your inverter and batteries?
I've used Temco and Windy Nation (examples)

Fusing (assuming 12v system)
I generally bus the batteries, then fuse them, then add a 600A switch (this one - sorry, the good stuff is not cheap). For this...
- I generally use a 400A ANL fuse (and holder) between the bused batteries and the switch (class T fuse is also popular)
- I generally use a 400A Mega fuse between the DC bus (Lynx) and the inverter input (assuming 12v, 4/0 or dual 2/0 cables)
- As for other DC ins/outs on your Lynx, fusing values will be a function of your wire guage which should always be a function of your expected max current draw plus some head room

The Victron Wiring Unlimited Book is a great resource, no matter what brand of equipment is to be used: https://www.victronenergy.com/media/pg/The_Wiring_Unlimited_book/en/index-en.html

Thanks again Jim!

Sticking with 12V for inverter and batteries. Have that same battery switch in my wish list, so we're good there. The fuse info is also very helpful. I opened up that wiring unlimited pdf earlier today and bookmarked it.

On this point:
- As for other DC ins/outs on your Lynx, fusing values will be a function of your wire gauge which should always be a function of your expected max current draw plus some head room
Is it as simple as theorizing what all I could potentially be running concurrently off the inverter, adding up the max amp draw and multiplying by 1.25? My early thinking was 200-250A, but that was based more on the BMS of the batteries being 250A versus doing the legwork to start adding things up. I could be way off here and will continue reading. I also need to get a design/diagram on paper so I can better visualize it in total.

One last thing I was going to ask. I've got the power jack to deal with. I've seen some people use a simple junction block with lugs inside the empty black plastic battery box to bridge the gap between the jack, the old lead acid battery location and the new 12V connection behind the nautilus panel. I realize this may not be best practice, but any downside to doing this?

Thanks again for the insight!
 

Jim Beletti

Well-known member
@billymac - long travel day for me, then dinner out with RV friends. Will try to reply later tonight.

Hoping others can weigh in on this as well. Nice to have more data points :)
 

billymac

Member
@billymac - long travel day for me, then dinner out with RV friends. Will try to reply later tonight.

Hoping others can weigh in on this as well. Nice to have more data points :)

No worries and no rush.

I picked up some more of the necessary parts today:

Blue Sea HD 3000 battery switch
VE Direct Cable for MPPT * I realize now I need a second VE Direct cable for the Smart Shunt. Wups.
VE.Bus Smart Dongle (for MPII - I'm assuming I need this even with Cerbo GX)
Go Power 400A Class T Fuse w/Holder
Victron 250A Mega Fuses
2x Victron RJ45 cables (one for dongle and one for MPII).

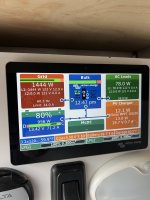
Debating on the Cerbo GX Touch. I'm sure I'll eventually get it, but I'd like to research a bit more. For example, does the Cerbo GX require Internet and/or WiFi to be able to utilize the Cerbo Touch screen functionality and access controls? If it doesn't then it makes it more of a no-brainer for times I don't have access or Starlink.

Still need to figure out fusing on the Lynx. I'll have the 4/0 going to the MPII, 6 AWG going to the MPPT and then likely 6 or 4 AWG (?) going to feed the 12V.

The link below is more or less what I'm installing. Less the DC-DC, the ATS, the onboard Gen and the 2nd MPPT. Credit to All About RVs.


billymac

Member
Multiplus II 2x120 and Cerbo GX Touch 70 on the way. I pickup 90ft of 6/4 SOOW next week. Items left to acquire:

Batteries
Ferrule & Battery Cable Crimpers
Ferrules, Lug Terminal Connectors, Heat shrink
Heavy Duty Wire Cutter
Battery Wire - Can I get away with 2/0 instead of 4/0? Batteries will be right next to 400A T Fuse, switch, lynx and ~6ft from inverter.
4 AWG wire - Lynx to 12V Coach and Lynx to MPPT.

Questions:

  1. Can I use 2/0 battery wire instead of 4/0? Thinking cost and slightly easier to work with. I see people using both in similar installs. I'd also save a bit on the crimper as I don't own one.​
  2. Any recommendations on good wire management accessories? Looking for good clips, clamps, ties and grommets. Will need something that will hold up above the underbelly.​
  3. In the attached diagram above, he has a black/ground wire coming from the lynx back to the breaker panel along with the positive. In most install videos I've seen, I only see a 4/0 or 2/0 ground cable coming from the Lynx to bolt drilled into the frame and shared with the ground wire from the MP2. I only need a single Red/Positive wire from the Lynx to feed the 12V to the coach and then a ground wire from the Lynx bolted to the frame, right? For the 12V positive to the coach, I was planning on using the same stock stud behind the access panel and just disconnect the existing battery feed terminal.​
  4. I will use 4/0 wire for the ground wire from Lynx as well as the MPII, but can I use 6AWG wire for the positive run from Lynx to 12V in coach, or should I stick with 4 AWG? SmartSolar MPPT accepts up to 6 AWG and was hoping to share similar size cables, ferrules and and terminals, if possible.​

Next Steps:

  1. Relocate stock table and table frame mounts​
  2. Remove false wall panel on door side​
  3. Purchase remaining parts/accessories​
  4. Take inventory​
 
Last edited:

billymac

Member
@Jim Beletti I've ordered up the balance of items I believe I need. Everything should be here later this week. I just have to pickup the 6/4 SOOW wire from my electrician friend and I'll be ready to get started. I think the only thing I'm missing is a breaker and breaker box/cover for the MPPT.

Here's where I ended up:

4/0 wire for batteries, switch, fuse, ground and DC in on MPII
4 AWG for Lynx to Coach
6 AWG for Lynx to MPPT

Fuses:
Go Power 400A T Fuse
400A Mega for main DC positive
250A Mega for DC positive to coach
60A Mega for MPPT positive

Battery:
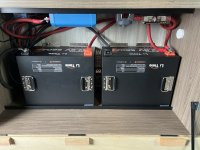
I changed this to Li Time 12V 560Ah Solid Edition Low Temp - this one is new, decided it was worth the low-temp cutoff and the few extra amp hours. It has 250A BMS, 250A sustained discharge and also 1000A@1 second. Likely start with 1, but plan is for 2.

Updated Questions:
1. Still researching/looking for some recommendations on good wire management stuff. Clips, clamps, etc.
2. Can I ground the Lynx and MPII to the frame that holds the table mounts on the roof of the pass through? If the actual painted frame is visible and easy to get to I'll use that.
3. What type of bolt and washer setup should I use for the (2) 4/0 lug terminals for the ground wires?
4. Approximately, how deep can I screw into the bottom board in the bed storage (252RL)

Aside from wire management and the proper hole saw bit(s) I'm pretty sure I've ordered up all the necessary tools, ferrules, terminals and accessories. Pretty excited to get started.

Any guidance or advice is appreciated.

Thanks!
 
Last edited:

Jim Beletti

Well-known member
Updated Questions:
1. Still researching/looking for some recommendations on good wire management stuff. Clips, clamps, etc.
2. Can I ground the Lynx and MPII to the frame that holds the table mounts on the roof of the pass through? If the actual painted frame is visible and easy to get to I'll use that.
3. What type of bolt and washer setup should I use for the (2) 4/0 lug terminals for the ground wires?
4. Approximately, how deep can I screw into the bottom board in the bed storage (252RL)

Aside from wire management and the proper hole saw bit(s) I'm pretty sure I've ordered up all the necessary tools, ferrules, terminals and accessories. Pretty excited to get started.

Howdy. I'm back home from our summer trip and nearly done unloading the RV. Washed it good yesterday.

With regard to your questions above, below are my musings :)

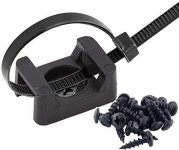
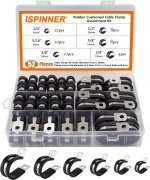
1. My wire management item selections are a function of how I mounted my gear. When I mount on a wood board, I like to use these tie wrap mounts with tie wraps. In some cases, especially on metal structure, I'll use these rubber coated SS cable clamps.

My wire management in my Delta build uses square finger duct / raceway. So the duct acts as a wire chase. I have yet to finish cleaning it up but it's close. Just need to swap my Orion DC-DC (30A) for the Orion XS 50 DC-DC.

2. I would not use that thin wall aluminum structure for grounding. Your best bet is to ground the the RV frame. Grind/scrape off the paint and use a bolt or a Tek screw to fasten your ground to.

3. Guessing this one is related to 2 above? I use what I have on hand. Since my frame ground bolt is exposed to the outdoors, I used a SS bolt, SS flat washers and a SS lock washer.

4. I'm not outside at the RV at the moment, but I recall that the floor isn't very thick (1" max) and that the top and bottom is very thin. Maybe 1/8" of luan or Azdel (unsure of which). Point being that there is not much for a screw to bite into. What I did primarily, for fastening wires below the pass-through floor was to use Tek screws and cable clamps to the vertical of the A frame.

41JNrDJNSrL._AC_.jpg 81+EDJeIINL._AC_SL1500_.jpg
 

billymac

Member
All great info, thanks @Jim Beletti for your time.

One other question I had for you was with regards to running the SOOW wire. Do you think there will be any access for pushing/pulling the wire into the underbelly near the door-side panel or the driver-side panel in the pass through? Hoping to either expand an existing hole or cut a new one adjacent to existing for the 2 runs of 6/4. Also hoping it becomes fairly evident once I get my eyes on it and remove that black false wall panel on the door side of the passthrough. Again, this is a 252RL.
 

Jim Beletti

Well-known member
Hey @billymac - WRT to getting 2 runs of SOOW cordage in/out of the the pass-through, on my 262RB, yes, there was room behind the center false wall, close to the door-side convenience panel. In fact, there's a large access from behind that panel, into the underbelly.

For my install, as I put my Inverter in the front radiused area of the pass-through, I brought all my AC/DC power cables up through the floor.
 

billymac

Member
Hey @billymac - WRT to getting 2 runs of SOOW cordage in/out of the the pass-through, on my 262RB, yes, there was room behind the center false wall, close to the door-side convenience panel. In fact, there's a large access from behind that panel, into the underbelly.

For my install, as I put my Inverter in the front radiused area of the pass-through, I brought all my AC/DC power cables up through the floor.

Thanks Jim. I absolutely love your design and implementation, but I'm afraid the engineering and craftmanship of your rack frame is WAY above my skillset! :D

My current plan is to follow a similar approach to Joseph Stauffer's install which would include removing that false wall panel, install a backing board to mount the MPII/Cerbo and then fabricating a carpeted facade to clean things up, hide wires while trying to make it look as close to stock as possible. I plan to use the extra space adjacent to the MPII to install my Starlink router, it's PSU and the Ethernet cable on a caddy (bought a frame mount flagpole for SL). I should receive the balance of the kit this week and will be bringing the trailer home from storage to install.
 

billymac

Member
@Jim Beletti and/or others. Hit my first speed bump this morning. The 4/0 Selterm lug terminals won't fit inside the Lynx distributor and they're too long for my T-fuse. Have been googling and it appears others using 4/0 wire have run into the same issue, but I'm not seeing solutions other than trimming down the pads. This wouldn't be a big deal I suppose if it was just a small trim at the end, but the taper at the end of the barrel is hitting the plastic housing inside the Lynx and I don't think the crimp is going to gain me enough to clear.

Jim, what did you use in your install? Any help here is appreciated.
 

billymac

Member
Well, you can disregard, Jim. Still curious what you ended up using and/or how you wired up your Lynx for the battery DC to MP2.

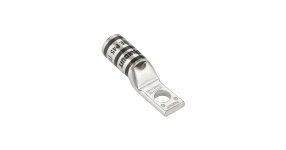
I found these and will have them next week:


Panduit 0000 Lugs.jpg
 

billymac

Member
Well, I'm closing in on it. I still have some cable management left to do, but I'll pluck away that. I also plan to fabricate something for the lower side to the right of the inverter to tidy things up. Some type of carpeted facade or raceway of sorts to make it look more aesthetically pleasing.

Already starting to research and plan for the solar upgrade. Thanks again @Jim Beletti for your time and insight. Much appreciated! BTW, I also posted up some questions in your Solar upgrade. Hoping you can take a look and answer at your convenience. :)

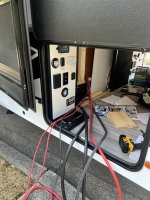
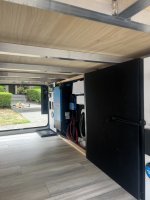
Here are some pictures. Be kind. I'm new to all of this and certainly not very fast, but I'm happy with how it turned out and learned a LOT.

IMG_6007.jpg
IMG_6006.jpgIMG_6009.jpgIMG_6011.jpgIMG_6023 (2).jpgIMG_6034 (1).jpgIMG_6043 (1).jpgIMG_6065.jpgIMG_6193 (1).jpgIMG_6199 (3).jpgIMG_6202 (3).jpgIMG_6205 (1).jpgIMG_6210 (1).jpgIMG_6216 (1).PNG
 
Top